
簡介
之前有做了一個 5 分鐘輕鬆完成, 但實際上其實這樣的 extension 是用途不大的,
所以這次來開發做多一點事情, 此次我們要能在 extension 的背景來幫我們執行一些事情
一樣先開立一個目錄 demo1
設定好 manifest.json
{
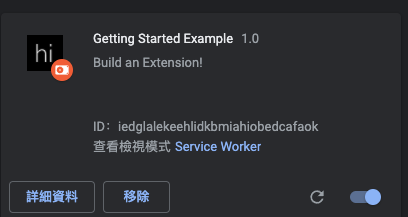
"name": "Getting Started Example",
"description": "Build an Extension!",
"version": "1.0",
"manifest_version": 3,
"background": {
"service_worker": "background.js"
},
"permissions": ["storage", "activeTab", "scripting"],
"action": {
"default_popup": "popup.html",
"default_icon": {
"16": "/images/get_started16.png",
"32": "/images/get_started32.png",
"48": "/images/get_started48.png",
"128": "/images/get_started128.png"
}
},
"icons": {
"16": "/images/hi_16.png",
"32": "/images/hi_32.png",
"48": "/images/hi_48.png",
"128": "/images/hi_128.png"
},
"options_page": "options.html"
}
tip:
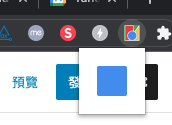
default_icon 的圖片指的是 menu bar 上的圖示
icons 的圖片指的是安裝的一覽表
一般來說的情形下, 圖片都應該是一樣的
設定好 popup.html , popup.js button.css
<!DOCTYPE html>
<html>
  <head>
    <link rel="stylesheet" href="button.css">
  </head>
  <body>
    <button id="changeColor"></button>
    <script src="popup.js"></script>
  </body>
</html>
popup.js
// Initialize button with user's preferred color
let changeColor = document.getElementById("changeColor");

chrome.storage.sync.get("color", ({ color }) => {
  changeColor.style.backgroundColor = color;
});

changeColor.addEventListener("click", async () => {
    let [tab] = await chrome.tabs.query({ active: true, currentWindow: true });

    chrome.scripting.executeScript({
      target: { tabId: tab.id },
      function: setPageBackgroundColor,
    });
  });

  // The body of this function will be executed as a content script inside the
  // current page
  function setPageBackgroundColor() {
    chrome.storage.sync.get("color", ({ color }) => {
      document.body.style.backgroundColor = color;
    });
  }
button.css
button {
    height: 30px;
    width: 30px;
    outline: none;
    margin: 10px;
    border: none;
    border-radius: 2px;
  }

  button.current {
    box-shadow: 0 0 0 2px white,
                0 0 0 4px black;
  }
之前簡介文章中有題到 popup 是點擊了上方的 menu 後的行為, 跳出來的網頁
他也可以嵌入 javascript , 故還可以設定 popup.js
當然 CSS 的使用也沒有問題 button.css
基本上此篇的練習就是點擊 popup.html 上的 button
會呼叫 changeColor , 將你開啟的 tab 的背景色換顏色
來看一下 popup.js 做了哪些事情
主要只有在 id 上把事件綁定上去.
選定好現在是哪一個瀏覽器 tab , 接下來就是
setPageBackgroundColor 把 網頁背景顏色換掉就做完了
接下來是來增加一些選項, 顏色只有一種太單調, 來增多種顏色提供選擇
這個是練習如果你有自己的 extenstions , 你可以提供哪些功能讓使用者行操作
一樣來設定一個 options.html 跟 options.js
options.html
<!DOCTYPE html>
<html>
  <head>
    <link rel="stylesheet" href="button.css">
  </head>
  <body>
    <div id="buttonDiv">
    </div>
    <div>
      <p>Choose a different background color!</p>
    </div>
  </body>
  <script src="options.js"></script>
</html>
options.js
let page = document.getElementById("buttonDiv");
let selectedClassName = "current";
const presetButtonColors = ["#3aa757", "#e8453c", "#f9bb2d", "#4688f1"];

// Reacts to a button click by marking the selected button and saving
// the selection
function handleButtonClick(event) {
  // Remove styling from the previously selected color
  let current = event.target.parentElement.querySelector(
    `.${selectedClassName}`
  );
  if (current && current !== event.target) {
    current.classList.remove(selectedClassName);
  }

  // Mark the button as selected
  let color = event.target.dataset.color;
  event.target.classList.add(selectedClassName);
  chrome.storage.sync.set({ color });
}

// Add a button to the page for each supplied color
function constructOptions(buttonColors) {
  chrome.storage.sync.get("color", (data) => {
    let currentColor = data.color;
    // For each color we were provided…
    for (let buttonColor of buttonColors) {
      // …create a button with that color…
      let button = document.createElement("button");
      button.dataset.color = buttonColor;
      button.style.backgroundColor = buttonColor;

      // …mark the currently selected color…
      if (buttonColor === currentColor) {
        button.classList.add(selectedClassName);
      }

      // …and register a listener for when that button is clicked
      button.addEventListener("click", handleButtonClick);
      page.appendChild(button);
    }
  });
}

// Initialize the page by constructing the color options
constructOptions(presetButtonColors);
利用 JS 來決定有哪些預設的顏色
const presetButtonColors = ["#3aa757", "#e8453c", "#f9bb2d", "#4688f1"];
再把每一個 button 都加上事件處理, 將顏色先儲存在 storage
chrome.storage.sync.set({ color });
再看一下 popup.js 他的行為就是先取得 storage 的資料,
function setPageBackgroundColor() {

chrome.storage.sync.get("color", ({ color }) => {

document.body.style.backgroundColor = color;

});

}
結果頁, 背景會變色

結論
此 Demo 的流程為
一開始安裝時, 會先在 background.js 先存一個預設得顏色在 chrome storage 裏面
接著是在 popup.js popup.html 中可以去動作,去改變背景的顏色
再來是設計一個 options.html options.js 可以去改變 chrome storage
因此要的權限就多
"permissions": ["storage", "activeTab", "scripting"],
reference :
https://developer.chrome.com/docs/extensions/mv3/getstarted/
下一章節再來看其他的 Demo 應用